3D Goblin – Stage 3
I had to put the goblin sculpture aside a few weeks ago due to a new project making my schedule a little fuller than I’d originally planned. This is how far I got after a grand total of approximately eight hours work…

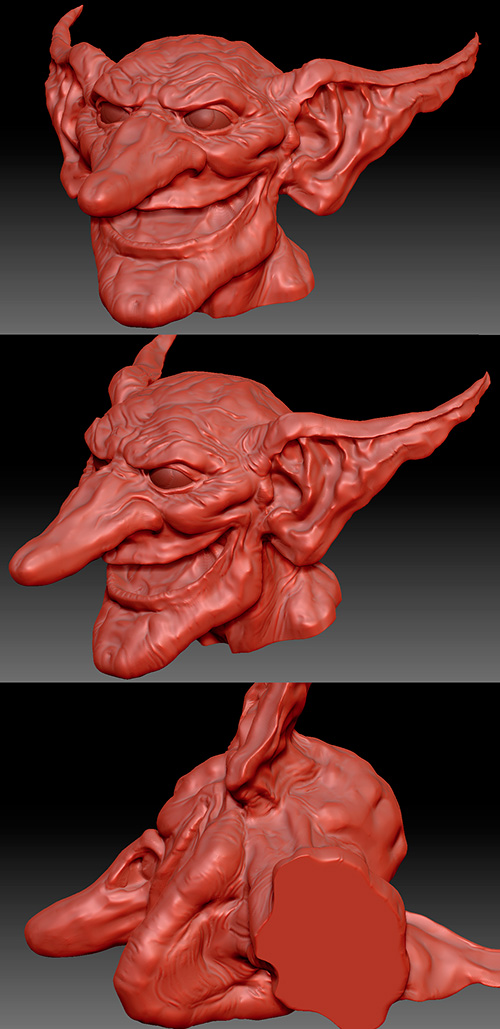
We’re at stage 3. The significant geometry of the goblin’s head and shoulders has been done. Here’s a laundry list of the changes:
- The brows got a little more furrowed.The nose got longer and the nostrils deeper. The flared outer parts of the nostrils got tidied up and better integrated with the face.
- The lips and jaw had the planar brush lightly applied to them. For the lips this had the effect of creating a stronger edge to the lip line, better delineating the change from lips to surrounding flesh. For the jaw, this was a subtler change, removing a little of the curvature in the flesh, unifying the angles and giving the suggestion of bone along the jaw line.This is particularly noticeable in the middle image above.
- The ears received a few tweaks in front and a significant amount of trimming in the back. At a certain angle (one I commonly use in goblin paintings) the upper rear of the ears had proven to be too chunky. By creating gentle slopes from the top and bottom rear of the ears that thickened toward the center I created the slimmer profile of ears I was used to but with a solid connection to the head that made it believable that the giant ears could be supported on the head rather than tear off under their own weight (ouch)!
- The skin around the eyes was changed to compliment the alterations around the nostrils and bridge of the nose.
- The skin of the cheeks that is forced upward due to the goblin’s smile was better blended with the upper lip. The previous version was a little too pronounced making the cheeks feel more like a significant protrusion than just cheeks pushed up and out in a smile.
- The mouth was hollowed out more in preparation for the addition of teeth, gums and tongue. That’ll be stage four!
Yeah, even though at first glance the changes may appear to be minimal, there’s actually a lot of tweaks going on.
And there’s at least one more detail pass to do before moving on to a texture pass. Just look at this close-up to see that I’m still working on a relatively low resolution sculpt. The polygons are easy to spot.

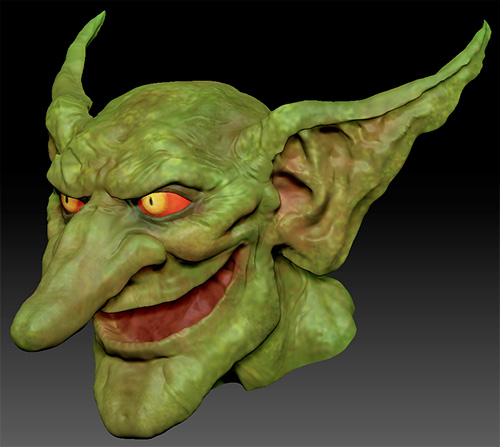
Finally, here’s a color test I tried out. This is just a proof of concept; a rough pass to see how a colored version might look. The eyes are especially bad at the moment as I’ve yet to learn how to use more than one material in a sculpt. The eyes obviously need to be more reflective as they’re currently quite dead which makes them bloody creepy, but not in a good way!

