Zakis Trickstab (2010) WIP Part 3
The final stages of the painting await!
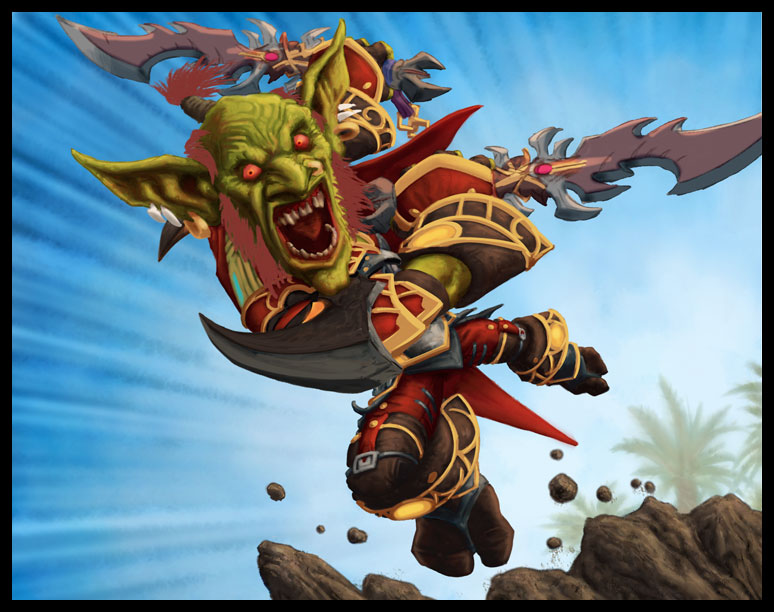
The first big change is the shoulder pads; they’ve been completely remodeled! Warcraft’s armor tends to be very intricate, even convoluted and sometimes the shapes can be hard to pin down quickly. It was only after looking at my ref for the umpteenth time that I realized the shoulder pads needed to be broader and the blade made chunkier with a little more curvature at the top and a lot less at the bottom.

If I find myself wondering how I missed this, I can console myself with the fact that no one at Blizzard caught it at the sketch stage either!
I’m a stickler for consistency and remaining true to the source material. There’s a reason I worked as the lead for Magic’s Continuity department for a couple of years; I like things to be RIGHT. Anyway, after re-working the near shoulder pad, I realized I had to add a portion of the other pad peeking out from behind the goblin’s head. Then I realized I had to re-color one of the sleeves. Better to discover these things now rather than later!
Next, I gave the skin tones a thorough upgrade to give the skin a little more life. The shadows have a lot more warmth added to them suggesting warm light reflected up from the (unseen) sandy ground below. This is achieved by either using opaque greens that are edging close to brown, or by several low-opacity applications of browns and reds. This is especially obvious around the ears which need the extra warmth to suggest the blood showing through. The skin of the ear is usually quite thin and so the blood in the tissue makes them appear warmer, especially if back-lit by the sun. I imagine a goblin’s monstrous ears are a good deal thicker than a human’s though so I don’t veer too far from the rest of the skin tones.

Next, the hair received a lot of attention that required me to entirely repaint the hair layer anew as just coloring what’s there tends to leave the hair feeling thicker and lacking the transparency hair has at its edges. Thankfully, I kept the hair in its own layer, and that allowed me to use it – with lowered opacity – as a guide for the new hair layer, and also made removing the old version trivial. Layers can be a force for good or evil; sometimes they give an artist the opportunity to waffle and not commit, but sometimes – like this – they’re a superior way to move forward while still being able to refer to what came before.
Everything on the figure has received a layer or two of blending to build form, and the contrast on the metals – especially the gold – has been heightened and some extra gold decor has been added to the interior of the cape. The teeth and jewelry have been darkened (to a suitably unsanitary brown) and everything on the figure has received a thorough going-over with a small hard brush to strengthen the edges and enhance detail. The gemstones gain some faceting. The daggers received a lot of detailing work as they’d been left pretty bare while I got the figure all… um, figured out.
In contrast, those damn midground rocks have had their prematurely applied texture toned down and blended away leaving a more natural finish that doesn’t fight against the planes of the rocks. The highlights that are added tend to use flatter color too.
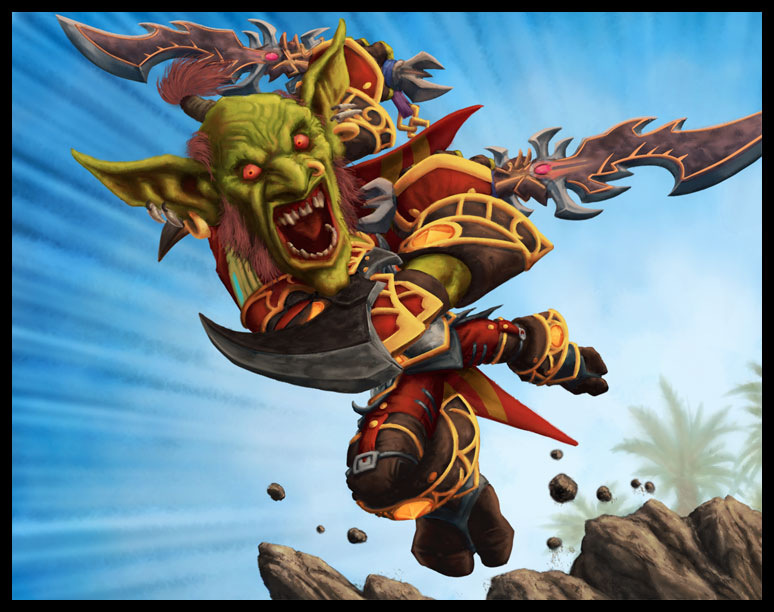
The bulk of the blending is done now. What’s left is to tighten up the details.

More highlights! Yellows have been added to the goblin’s skin, oranges to his hair and the irises of his eyes. Metal highlights have become even stronger. The daggers have gained a lot of fine lines to pick out the sharp contours of the blades and decorations. Slowly but surely, everything is becoming more solid, more real. Well, as real as you’d want a four foot homicidal critter lunging at you to be.
The big tweak at this stage is the portion of the cape that appears between his legs. Originally its edges were very straight to accentuate the momentum of his leap but as the painting progressed that portion didn’t feel like part of the cape. It was reading as the back end of a loincloth. So, using the Warp Transform tool in Photoshop, I curved that section of the cape and then applied a few brush strokes to seal the deal and make it feel a part of the billowing whole. It may still read as a loincloth to some but at least now you can believe that the lower edge of the cape might connect somewhere behind the goblin.
One more tweak at this stage; I realized a little of the gold on the breastplate should be showing so a little repainting happened smack dab in the center of the figure.
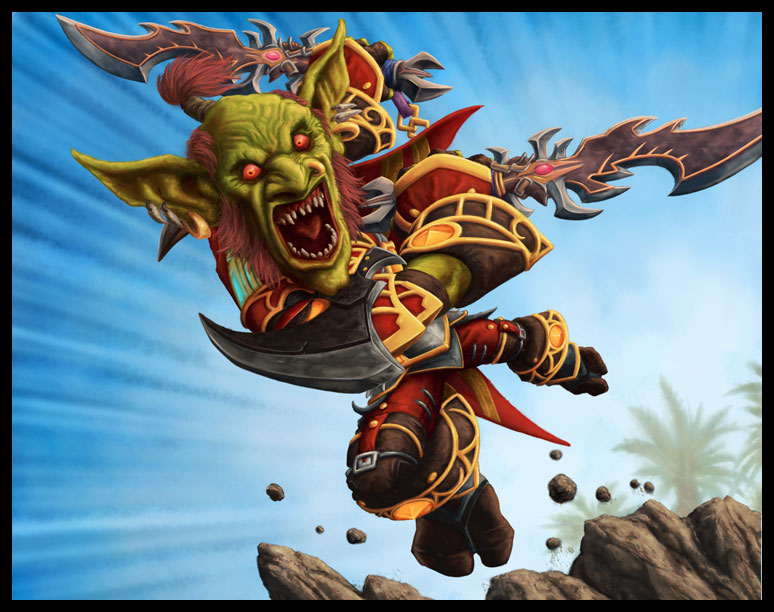
Onto the last sweep of polishing the picture…

More highlights! No, really. Skin, hair, eyes, teeth and metal all get a little more oomph. Some of this is achieved with paint, and some with careful use of the Dodge tool. Be careful with the Dodge and Burn tools as they’re not known for their subtlety. I tend to save a History state before I start using them and after I’ve finished applying them I can paint back to the History state at various opacity levels giving me complete control of how each Dodge change looks without damaging the original. Y’see, you have to use the Dodge and Burn tools in the layer where the paint is so you don’t have the safety net of being able to wipe a layer that didn’t work and be able to start over with your painting untouched. There are varieties of Burn & Dodge layers but I find they give different results to the base tools.
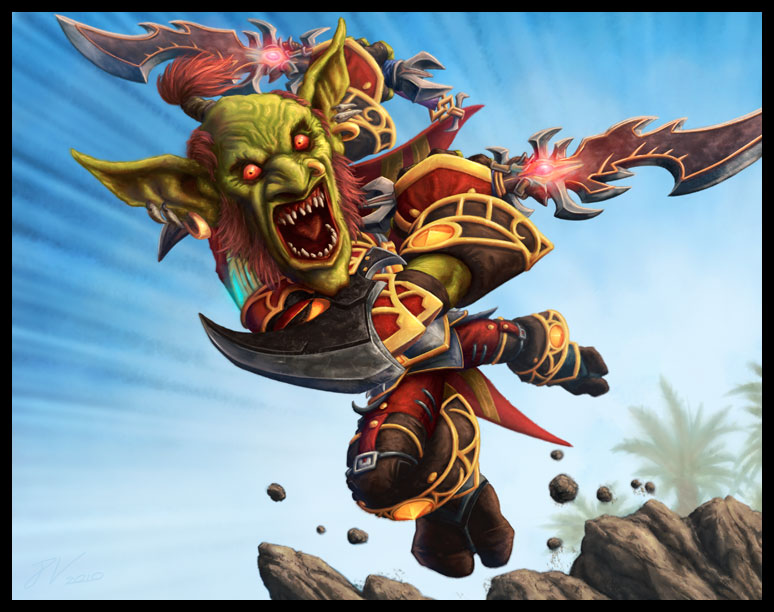
The gems all gain a little glow (or a lot in the case of the weapons’ gemstones) and the sky has one last application of a light blue to tone down the speed lines in the lower left.
And there’s one more tweak! The bladed tassel hanging from the handle of the left weapon was not only trailing at an angle that didn’t aid the illusion of momentum, it was also vanishing behind the cape when the cape would clearly be the element furthest from the viewer. A little cutting, pasting into a new layer, rotating and repainting, and voila! a new tassel clearly in front of the cape. You can be sure I was *headdesking* about that one!
And that’s it! All in all, I’m really pleased with Zakis. He’s managed to retain the sense of momentum from sketch to finished painting (dynamism is so easy to dilute when you’re working on an images for many hours) and he’s just bursting with personality, even if that personality is psychotically murderous!
Wow, when I started this WIP, I expected it to be one, not three posts. Anyway, hope you enjoyed the tour!
Got any questions? Feel free to ask, preferably in the comments section below.
